AWS EC2 Setup

I’m an EDI Integrator Developer & Analyst with 1 year of experience in EDI mapping and WebEDI. My secondary skills include backend development using Django, Node.js, and ASP.NET MVC, along with working on cloud deployments using AWS EC2 and Docker. I’m currently expanding my cloud knowledge by learning AWS Cloud Practitioner to build modern, cloud-ready applications.
Introduction:
EC2(Elastic Cloud Compute) instance is a virtual server in AWS cloud that you can use to run your application. You can choose its CPU, memory, storage and operating system for hosting websites or running databases.
In this article, we will show how create ec2 instance by using AWS Console and connect it from our local pc.
Creating EC2 Instance
Step 1: Navigation to EC2 Instance Dashboard
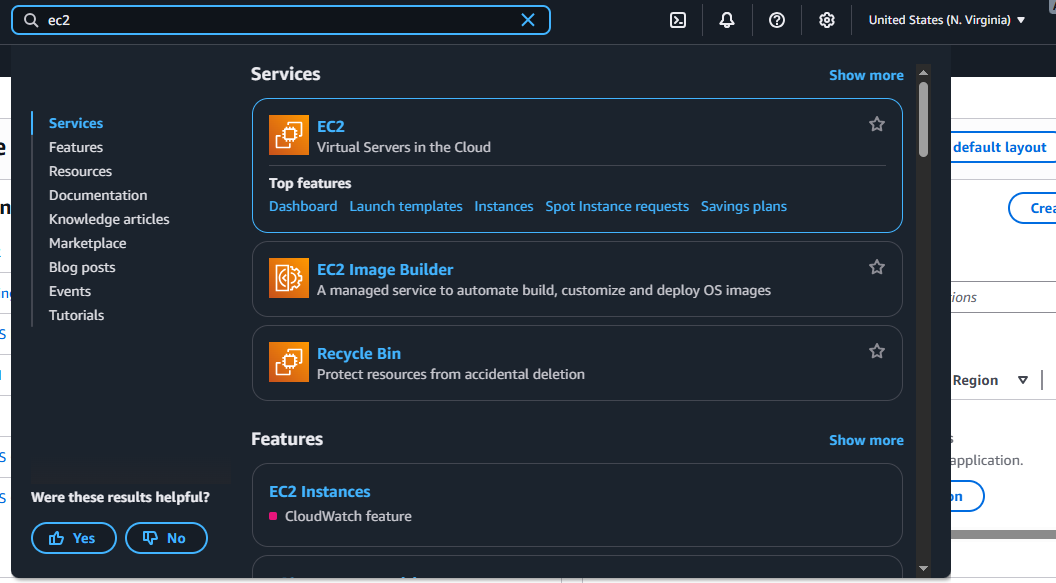
Go to dashboard and search for EC2.
Navigate to EC2.
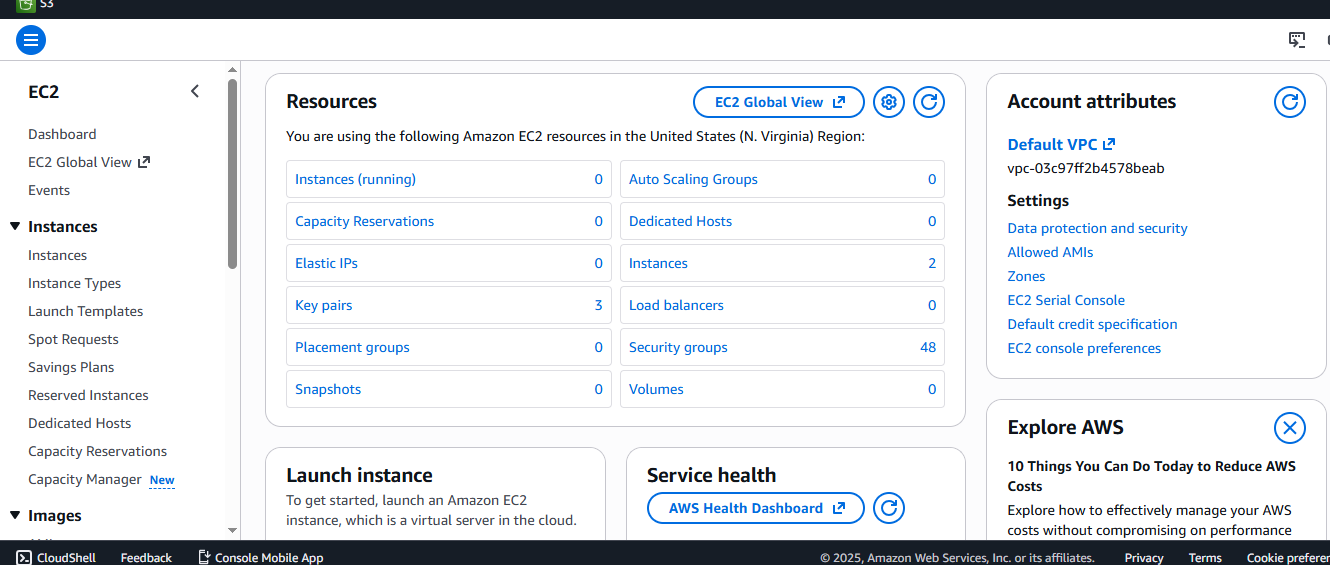
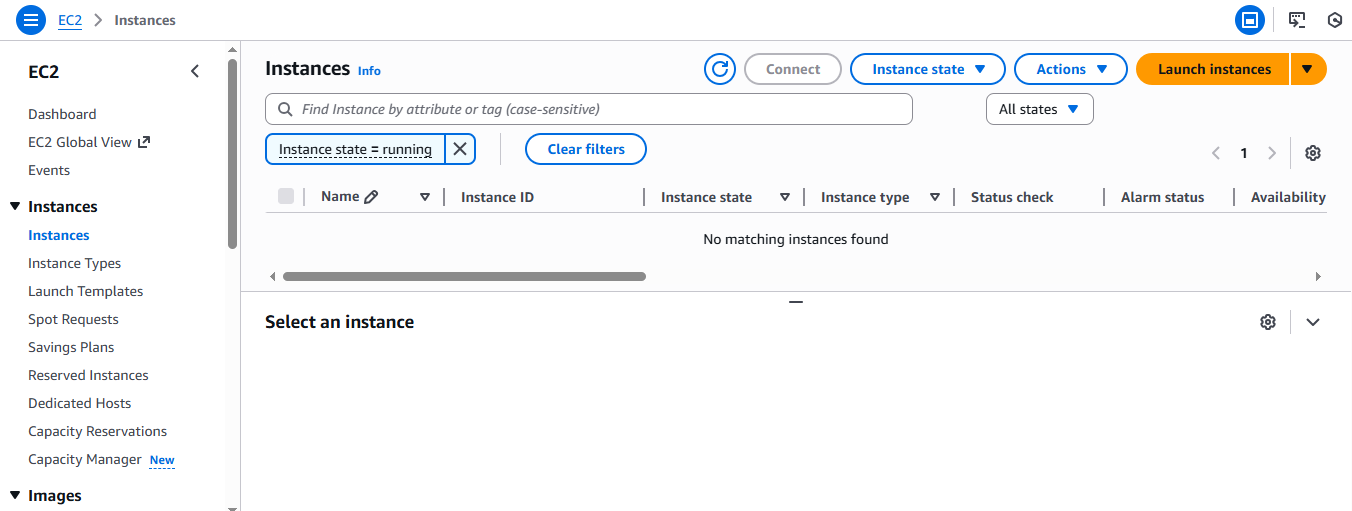
Navigate to Instance Dashboard by clicking Instances from Resources section or from Sidebar. I am highlighting them for your ease.
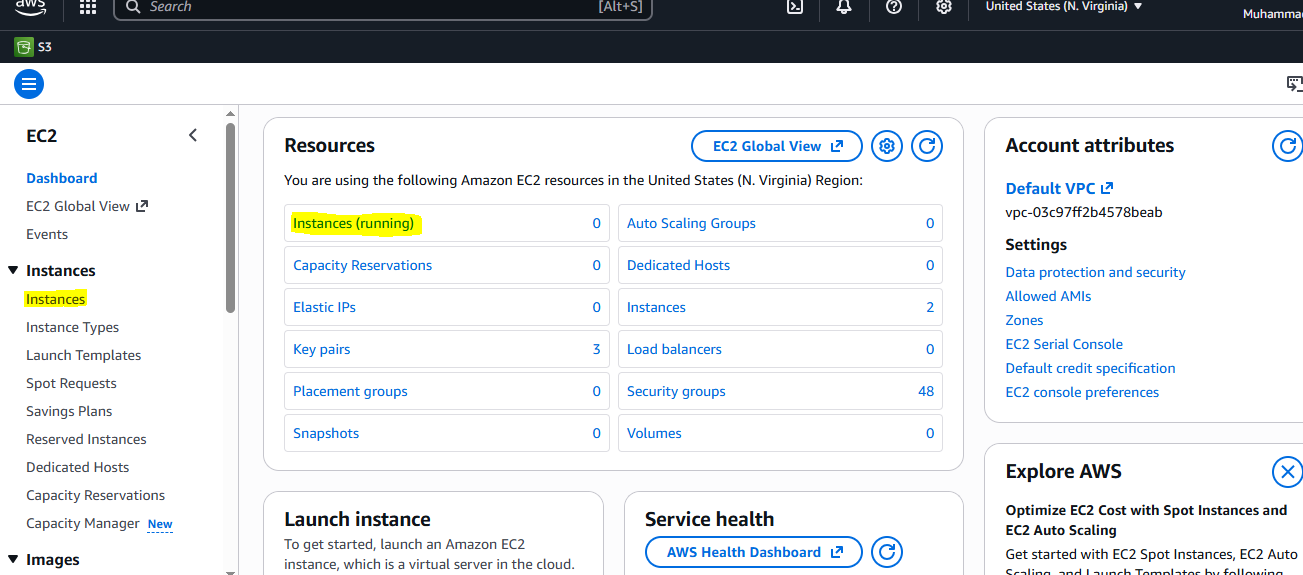
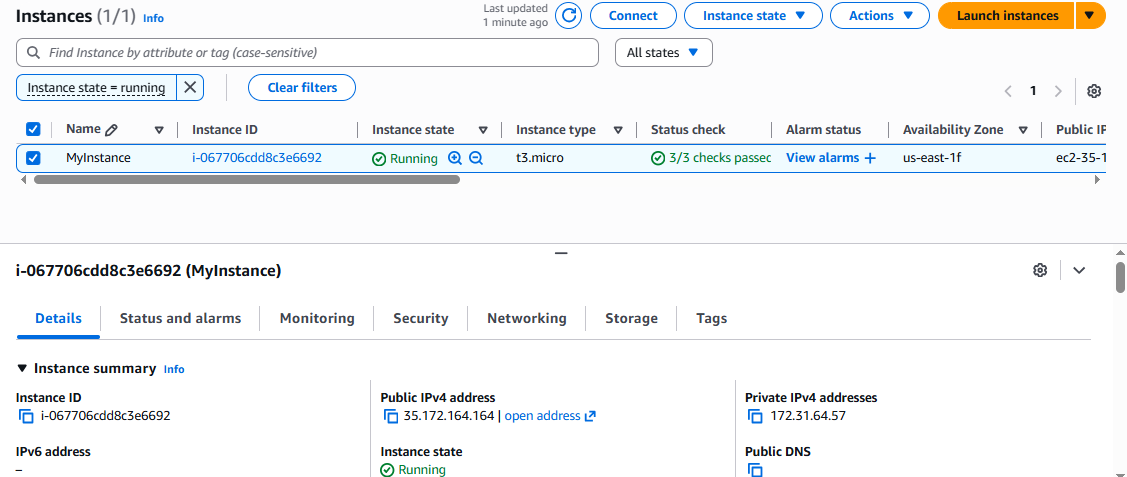
You can see your instances here if they are running.
Step 2: Launching Instance
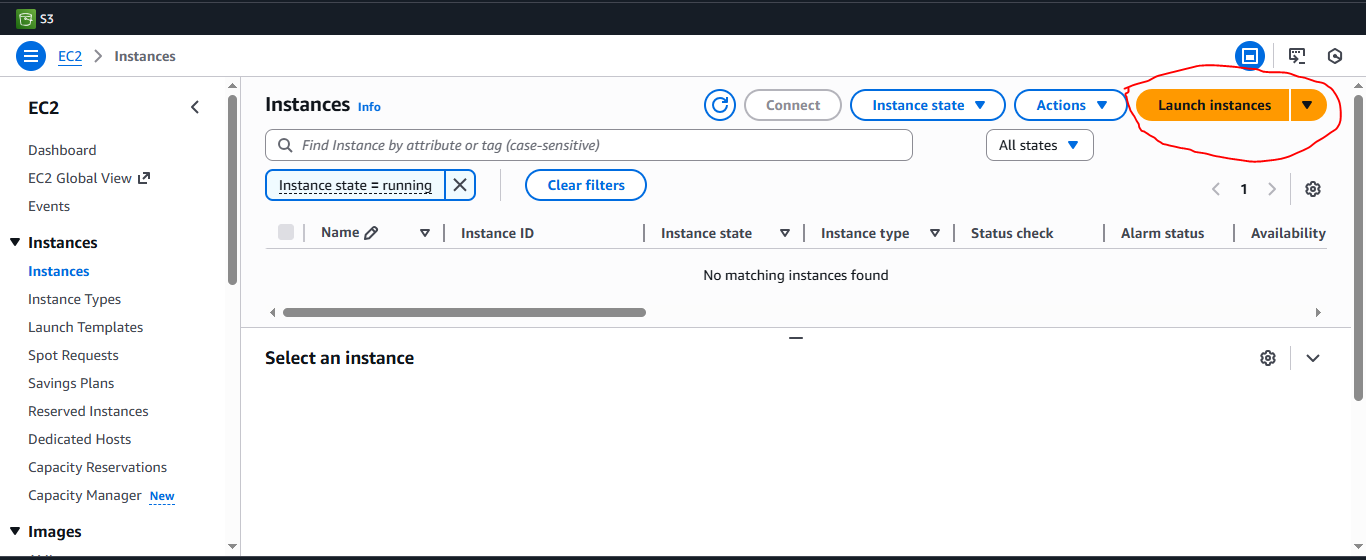
For launching, you need to to click Launch Instance on right left corner. I am marking it for your ease
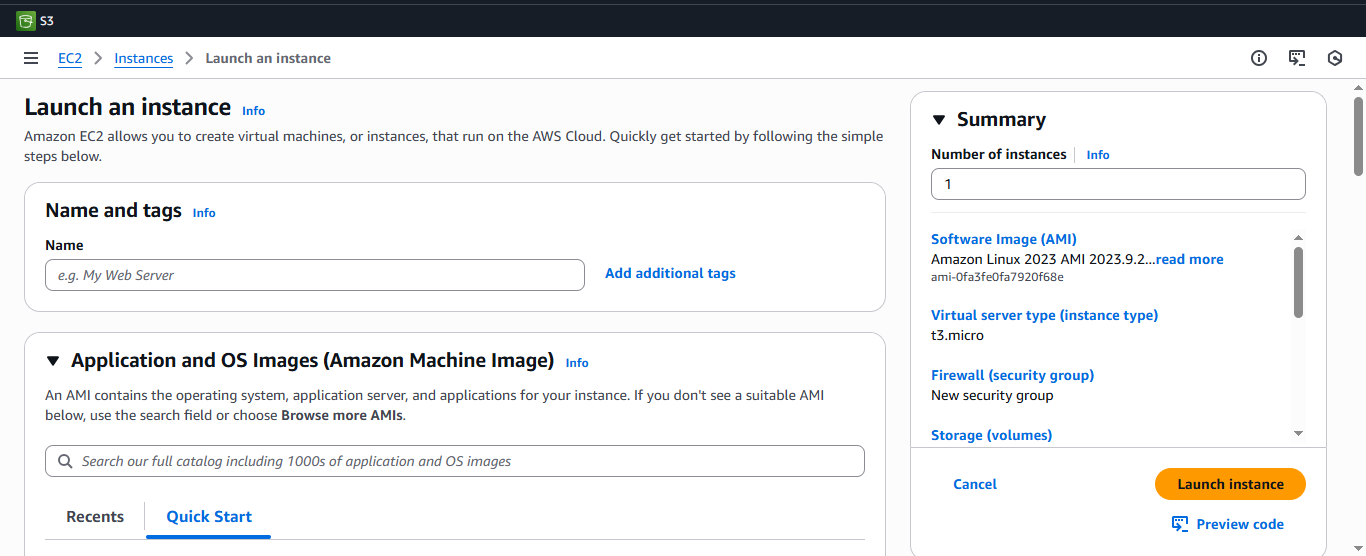
After clicking Launch Instance You will be move to its configuration page
Step 3: Setting Instance Name
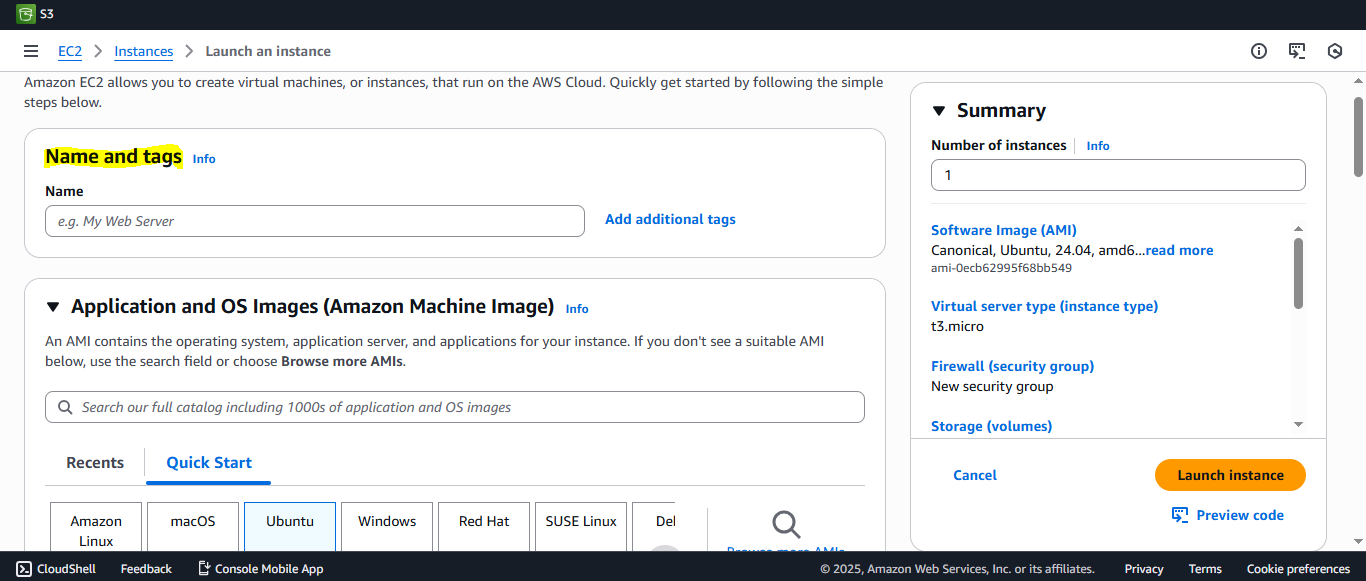
Set your instance name in Name and Tag section.

Step 4: Configuring Amazon Machine Image
AMI (Amazon Machine Image) contains the operating system, application server, and applications for your instance.
Select any OS from list shown in Amazon Machine Image section.
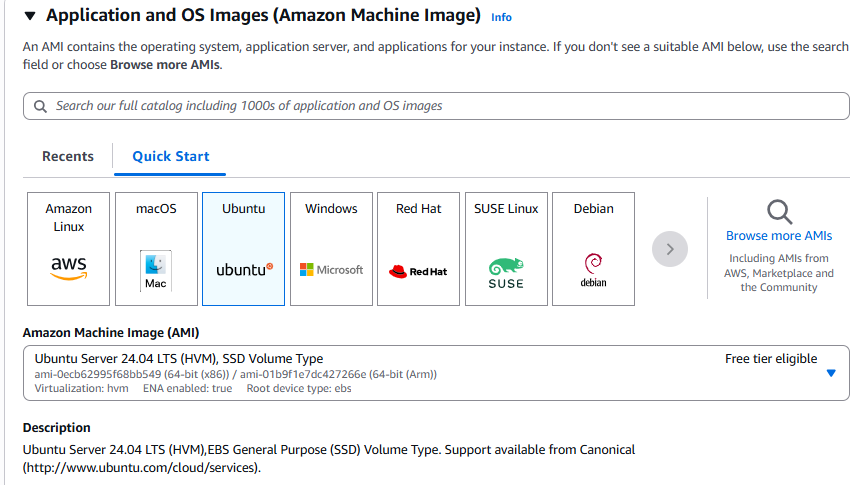
Select an AMI that fulfills your requirements. I have chosen a free-tier AMI for this tutorial, but you should select one according to your requirements.

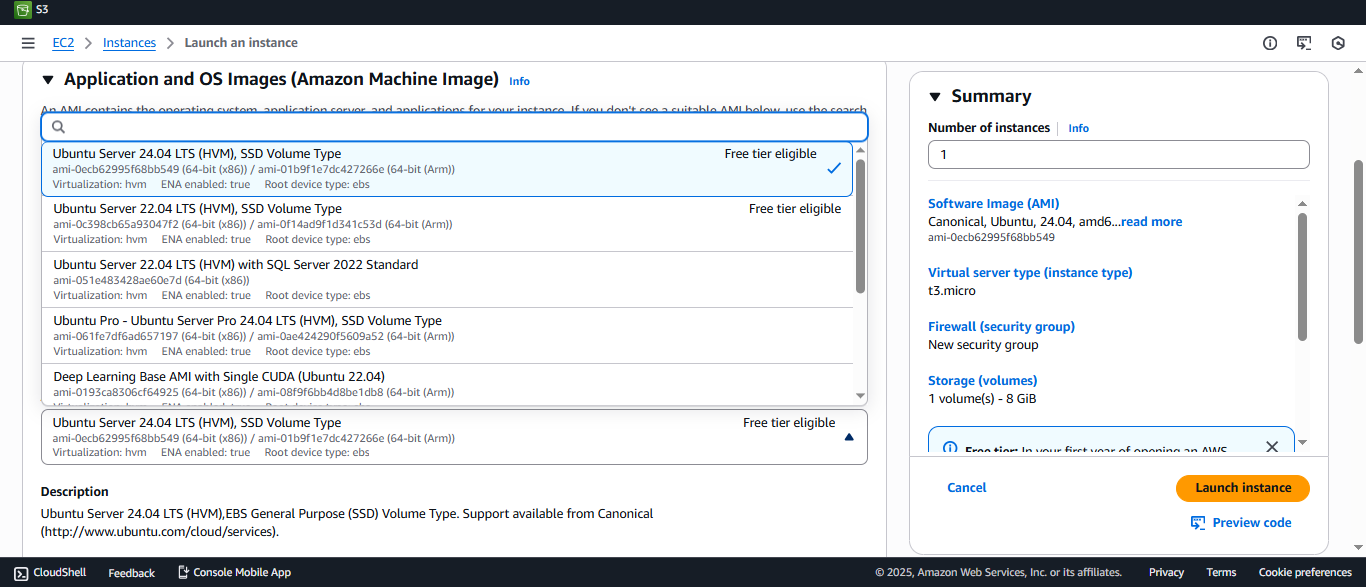
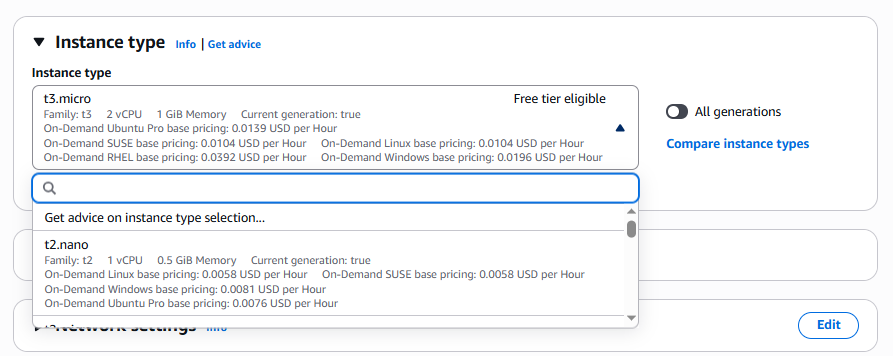
Step 5: Select Instance Type
Instance Type defines your hardware for you EC2 Instance. You can find different types of Instance Type such as t3.micro which have 1 GB RAM and 2 virtual CPUs. You can select anyone which fulfills your requirements.
Step 6: Creating Key Pair
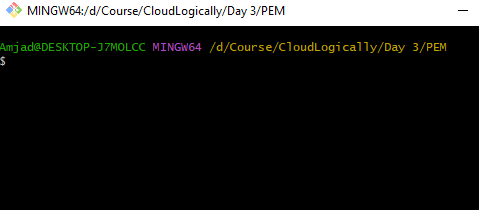
A key pair is a set of security credentials that allows you to safely login to an EC2 instance. The public key is saved on the instance while the private key is downloaded in your local pc and you can save it anywhere you want. The private key is used to SSH(Secure Shell, a secure way to connect to a remote computer over the internet) into a Linux while it decrypts the administrator password on Windows.
For creating Key Pair, you need to click Create new key pair

Provide Key pair name, select Key pair type(encryption method for generating keys) and private key format.
You are seeing two types of format i.e., .pem and .ppk. pem is used for SSH on Linux/macOS, while ppk is for connecting from Windows using PuTTY.
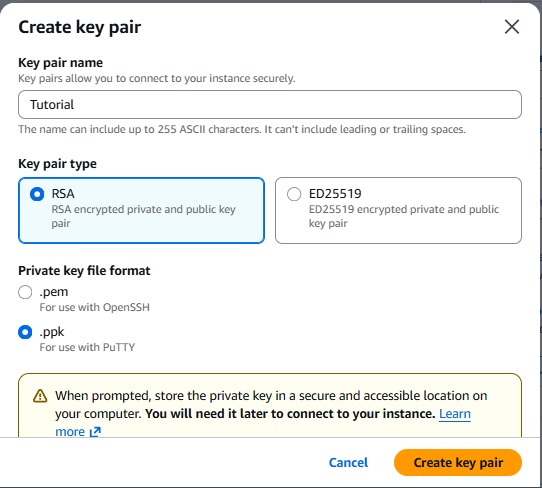
When you Create key pair, it will be automatically downloaded into you local system
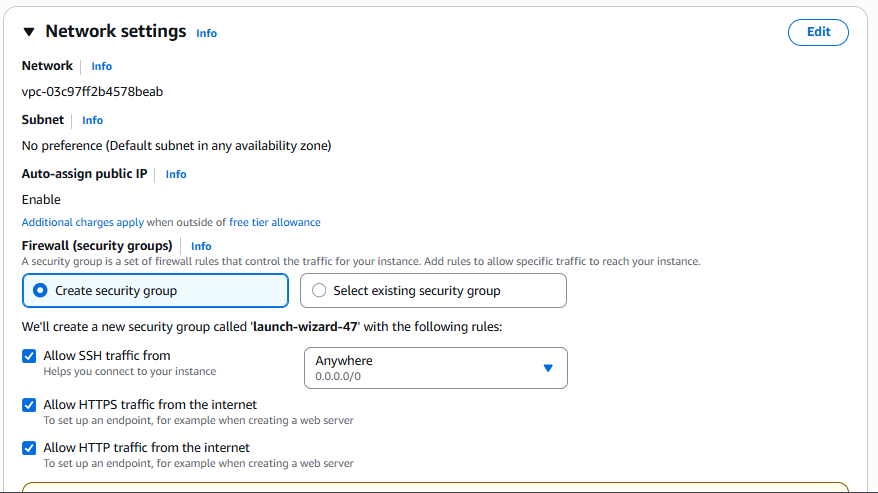
Step 7: Configure Network Settings
Network settings define how your EC2 instance connects to the internet and other resources. This includes the VPC, subnet and security group which control the network and firewall rules for your instance.
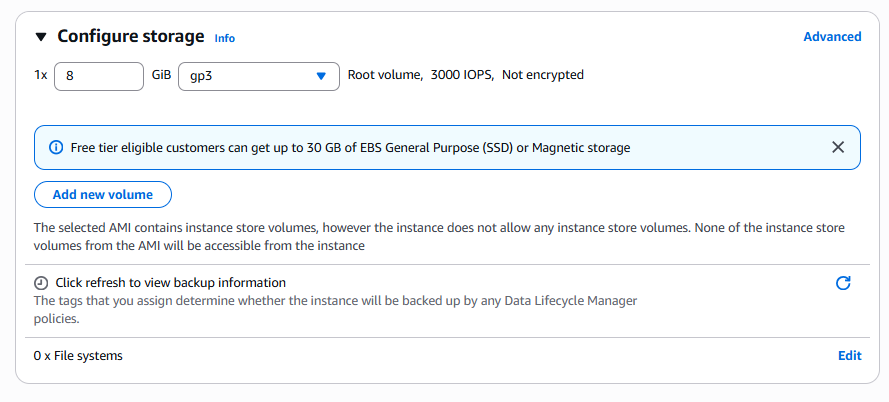
Step 8: Configuring Storage
You define storage for your EC2 Instance in this section.
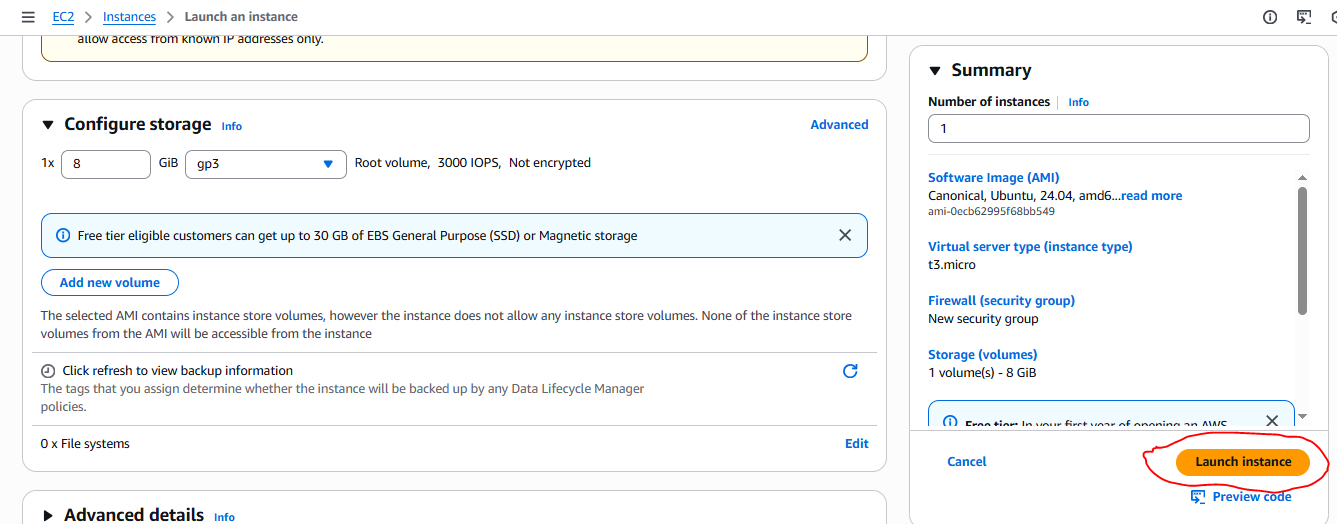
Step 9: Launching an EC2 Instance.
Now your instance is configured and ready to launch. Launch it by click launch instance

Your instance is launched successfully. Go back to Instance Dashboard and you can see it in the list.
Connecting to EC2 Instance:
Connecting EC2 Instance with .ppk Private Key
If you selected private key file format .ppk, you will need PuTTY to connect it.
Step 1: Open PuTTY.
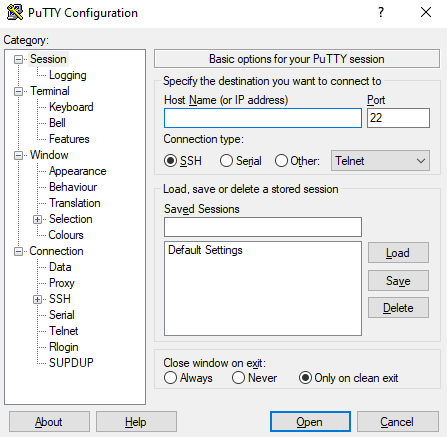
Step 2: Enter Public IP Address of your EC2 Instance. You can find it by selecting your instance in the dashboard.
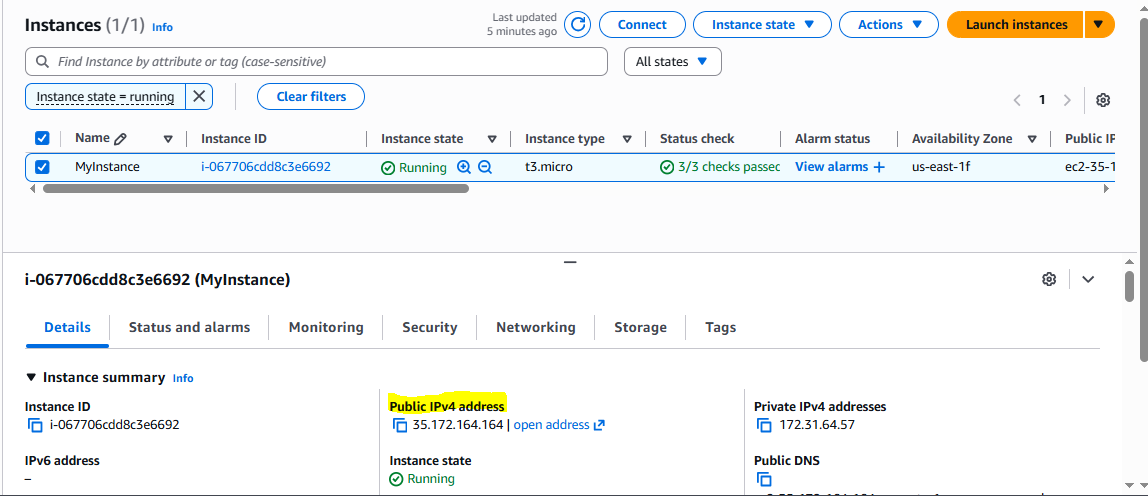
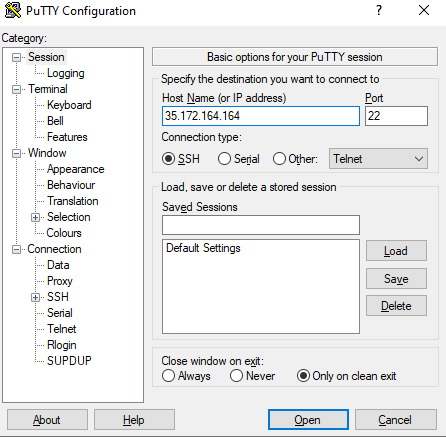
Copy it and paste it into the field.
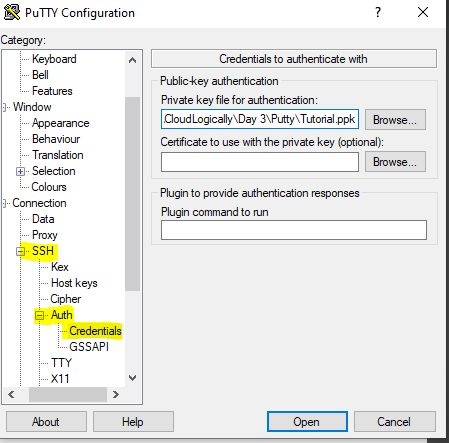
Step 3: Navigate to SSH/Auth/Credentials and browse for your private key.
Step 4: Once you open it terminal will be appeared. Enter your username here. My OS is UBUNTU, so I will enter UBUNTU here. Use following documentation for entering correct username
https://docs.aws.amazon.com/AWSEC2/latest/UserGuide/managing-users.html
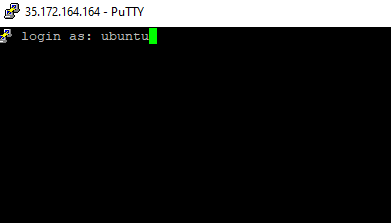
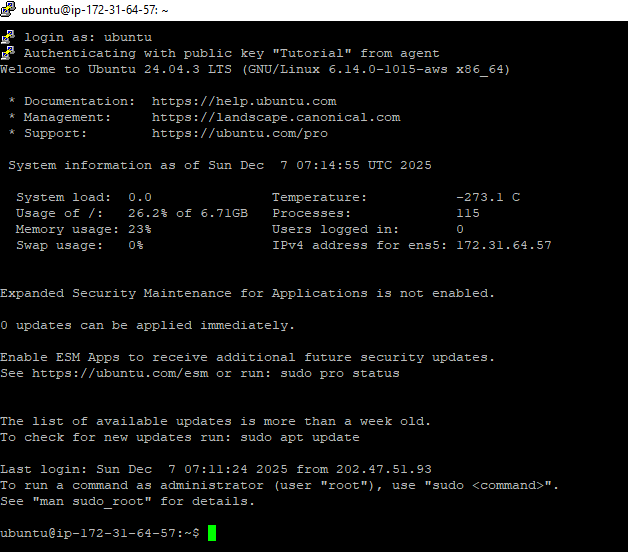
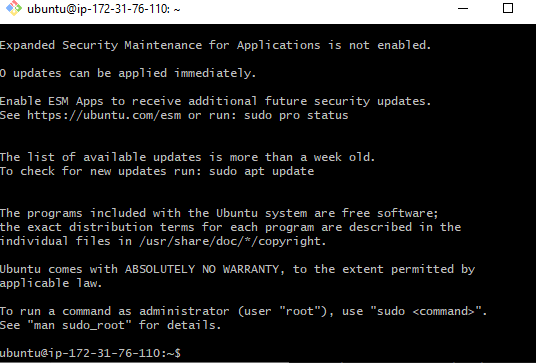
Now you are successfully connected to your EC2 Instance.
Connecting EC2 Instance with .pem Private Key
If you are in LINUX, you will have no issue to connect it. If you are in Windows, you will need GitBash or PowerShell to connect it. I am using GitBash for this Tutorial
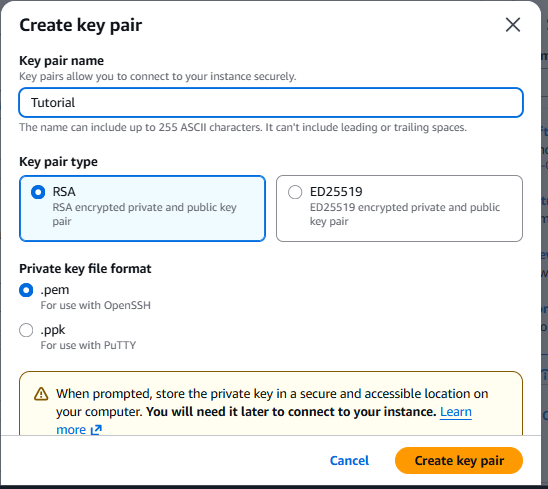
Step 1: Navigate to folder in GitBash where private key are saved
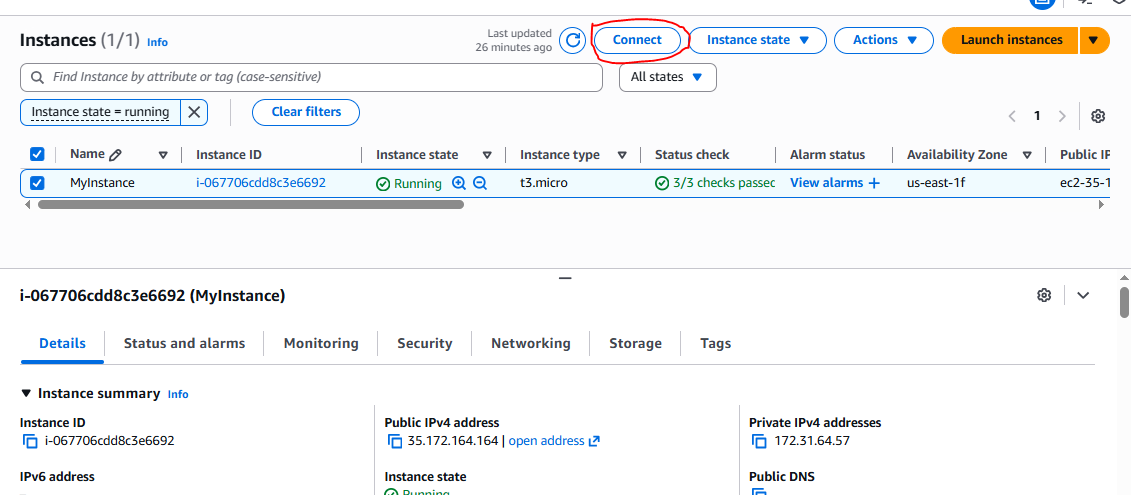
Step 2: On Instance Dashboard, click on connect. You will be navigated to the Connecting Instance page.
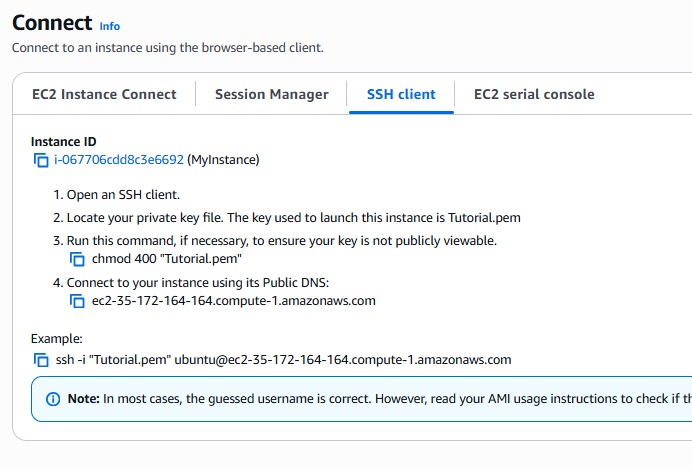
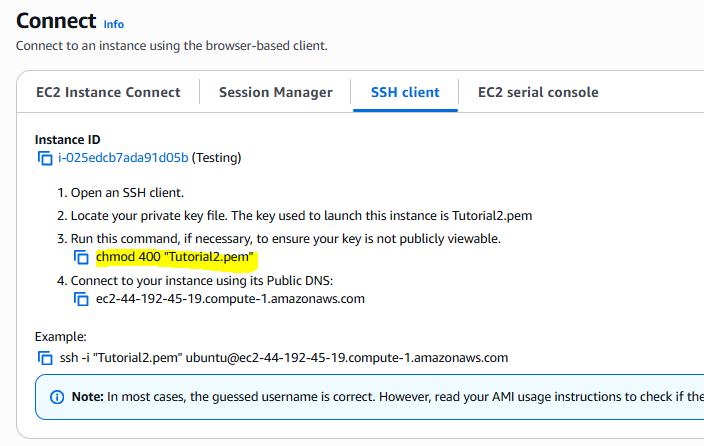
Step 4: Run chmod 400 "Your_FileName.pem" in your gitbash. In my case filename is Tutorial.pem, so I will run chmod 400 "Tutorial.pem” in GitBash. If you do not know the command, you can also copy from Connect Page.

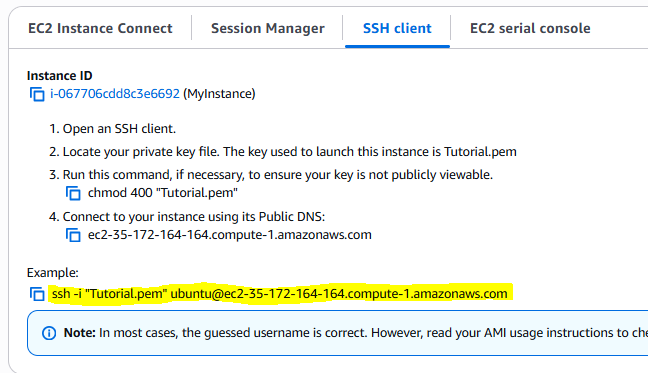
Step 5: Now for connecting instance copy following command from Connect page and run it in GitBash
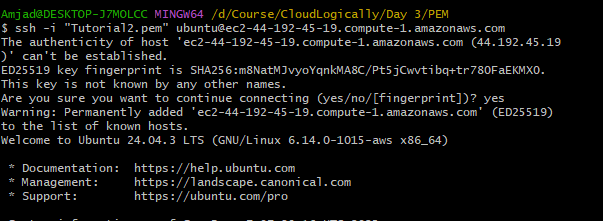
Now you are connected to EC2 Instance